This post may contain affiliate links, my full disclosure can be read here. As an Amazon Associate I earn from qualifying purchases.


If you’ve been thinking about expanding your backyard chicken flock learning how to incubate chicken eggs is a great way to get started.
Incubating chicken eggs is a simple process of placing fertilized eggs into your incubator for 21 days. Keeping the temperature between 99 and 102 F and turning the eggs at least 3 times a day.
But there are many little things you can do to help improve your hatch rate.
Hatching your own chicks is so much fun! I can still remember the first time I hatched my own.
Back when I was a kid I started keeping my own flock of banty chickens.
I borrowed an old incubator and placed 6 eggs inside. I was so excited when 4 of them hatched! It’s an amazing thing to watch chicks working hard to come out of their shells.

Still today I start and hatch out many batches of eggs every year. It’s become something my children love to help with and a great way to expand our chicken flock as needed.
These simple tips will help you to successfully start hatching your own chicks too.
But I must warn you it becomes a little addicting and you may find yourself wanting to start eggs from many different chicken breeds to add to your flock. Bringing chicks home from the feed store becomes more tempting too.
Supplies Needed
- Incubator
- Thermometer/Hydrometer combo
- Fertilized eggs
Choosing Eggs
Before you start setting up your incubator you will want to make sure that you have access to eggs for hatching.
To hatch the eggs must be fertile, this means they need to be collected from hens that have been housed with a rooster for breeding.
Eggs you find sold in grocery stores are not fertilized. Those come from large egg farms where hens are housed and have not been in contact with a rooster.
If you keep a flock of chickens already the easiest way is to collect your own eggs for hatching. Otherwise, you can order fertilized eggs from hatcheries or from local chicken farmers to get started.
Caring For Eggs
Eggs for hatching can be stored up to 7 days before placing them into your incubator.
Keep them in a cool area that stays between 55 to 60 F (12.7 to 15.5 C). Do not ever store eggs for hatching in the refrigerator it’s just too cold.
How To Set Up Your Incubator For Chicken Eggs
Set up your incubator a week before you plant to start incubating the eggs. This gives you time to make sure that the temperatures are staying stable.
Wash it well with a 10% bleach solution, with a second washing of hot soapy water before rinsing well. This will make sure you are starting with a nice clean environment for the eggs.
Once the incubator is fully dry place it in an area that is draft-free and where temperatures will stay constant.
Fill up the water reservoir in the incubator and add the thermometer and hydrometer and then turn it on.
Adjust the temperature settings until it stays between 99 and 102 F (37.2 and 38.3 C).
Don’t let the temperature drop below 99 F (37.2 C) and don’t let temperatures over 102 F (38.3 c) last for more than a few hours or it could kill the chicks.
Adjust the amount of water in the incubator to keep the humidity between 50-55 percent during the first 17 days of incubation.
I use a thermometer/hydrometer combo that makes things so much easier. It can measure indoor or outdoor temperatures.
So I set it to outdoor and place the long wire end down inside the incubator. Then I can easily see at a glance what the temperature and humidity are at without having to open the lid.
It just makes things so much easier!
How To Hatch Chicken Eggs
Day 1: Setting The Eggs


Once your incubator has been set up for a few days and is steadily keeping the right temperature levels you can add your eggs. This step is called setting the eggs.
If you are not using an automatic egg turner in your incubator then take a minute and draw an X on one side of the eggshell and an O on the opposite side using a pencil. This will help you with turning the eggs later on.
You’ll want to place at least 6 eggs inside to hatch especially if you are new to hatching chicks or if using eggs that have been shipped as they have a lower hatch rate.
When placing the eggs inside the incubator set them so the X marked side is facing up.
For the first 24 hours after placing the eggs inside your incubator leave them alone other than checking on the temperature.
Day 2-18: Turning The Eggs
Turning the eggs is an important part of the incubation period.
Ideally, during its growth, the chick embryo should be on top of the yolk. But the yolk often tends to float upwards. This can cause the developing chick to be squeezed between the yolk and shell.
Turning the eggs helps to move the yoke away from the shell helping to protect the growing embryo.
Eggs need to be turned 3 times a day. You can do this the easy way by using an automatic egg turner or turning them by hand.
Since you marked each side of the egg with an X and O it makes this step much easier. Starting with one egg turn it a quarter of the way around so the X is facing to the side. Replete this for each egg.
The next time you turn the eggs, place the O side up. Continue turning the eggs the same way each time.
Days 18-21: Lockdown Getting Ready For Hatching
By the 18th day, the chicks have developed and are getting ready to hatch out. There are a few important things you can do to help give them the best chance.
On day 18 stop turning the eggs. At this point in development, the chicks are positioning themselves inside the eggs for hatching.
If your incubator has air plugs now is the time you can open those to let more air into the incubator. The chicks will need more fresh oxygen as they are hatching.
Keep maintaining the same temperature but raise the humidity to 70 percent.
Day 21: Baby Chicks Start To Hatch

Normally chicks start to hatch on the 21st day of incubation. But if the eggs were kept a bit to cool before you started to incubate it can take a bit longer.
So don’t give up if they haven’t started hatching on day 21. It’s also possible for them to start hatching a day or 2 early if the incubator was a bit warmer then normal.
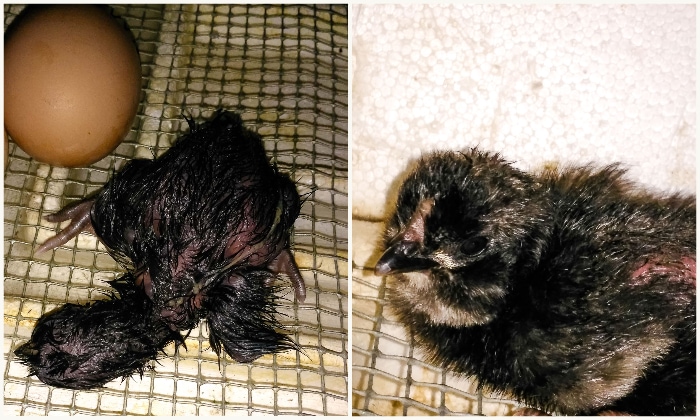
When chicks first start to hatch you will see a small opening in the middle of the egg. This is called pipping out.
Slowly the chick will work its way around the egg working to make a crack line around the middle before finally pushing the eggshell open.
This process can often take 24 hours but I’ve seen chicks complete the hatching process in as little as 5 hours too.
It’s important not to help chicks during that hatching process as much as possible. During this time the chicks are slowly absorbing the egg yolk and blood vessels may not have dried up yet.
Pulling the eggshell off to soon can cause bleeding that can kill the chick.
Leave the chicks in the incubator until they have dried off.
I know you may feel rushed to get them out of there but they are still wet and the safest place for them to be right now is in that nice warm incubator.
Chicks can stay in the incubator for up to 2 days without worry.
This is a good thing because the more you open the incubator to remove chicks the higher the chance of harming chicks that are still in the process of hatching.
Opening the incubator can cause a change in temperature and humidity that can make the membranes around the hatching chicks dry out. This makes it much harder for them to finish hatching.
So be patient and let the hatch finish undeserved as much as possible. Once the chicks have all hatched and dried off you can move them to the brooder.

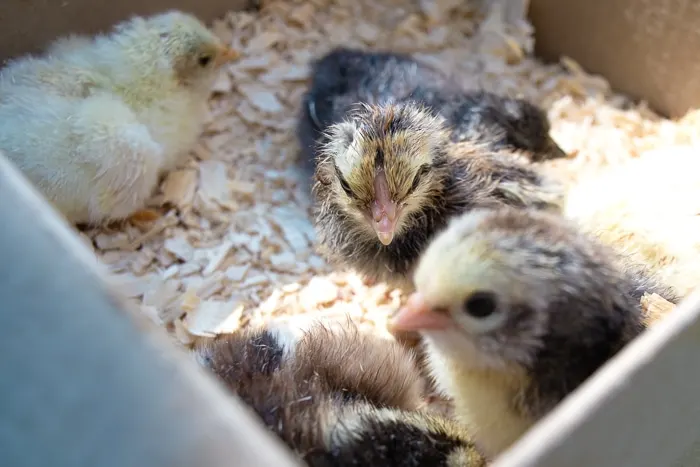
If you don’t have more eggs hatching, but the baby chicks are at least half dry you can move them into the brooder early. Many find that they dry off faster in the brooder than in the incubator because it’s less humid.

How To Incubate Chicken Eggs
Equipment
- Incubator
- Thermomitor
- Hydrometer
Materials
- Fertilized Chicken Eggs
- Water
Instructions
- Select fertilized chicken eggs that are clean. They can be stored up to 7 days in a cool area that is 55-60F (12.7-15.5C) until you have enough for hatching.
- Wash the incubator down well with a 10% bleach solution. Follow up with a second washing of hot soapy water and rinse well.
- 7 days before you plan to start the eggs turn the incubator on, fill it with water and add the hydrometer and thermometer.
- Adjust the temperature settings until it says between 99-102F (37.2038.3C). Also, adjust the amount of water to keep the humidity between 50-55% for the first 17 days.
- Once the temperature is holding steady you can add the eggs to the incubator. Using a pencil mark one side with an X and the other with an O. Place all the eggs so the same mark faces up.
- From day 2-18 turn the eggs 3 times a day, a 1/3rd turn works well.
- On the 18th day stop turning the eggs. This is the lockdown stage were you don’t want to open the incubator until the eggs have hatched. The chicks have developed and are getting ready to hatch. Remove the air plugs from your incubator and raise the humidity to 70%.
- On day 21 your eggs should start hatching. It starts with a small chip in the eggshell, this is called pipping out. It will work it’s way around the egg cracking it open until it can push out. This can take 5 to 24 hours.
- Leave the chicks in the incubator until they have fully dried off then move them to the brooder. It’s best not to remove any until all the eggs have hatched.
Connect With Homestead Acres!
Be sure to follow me on social media, so you never miss a post!
Facebook | Twitter | Pinterest | Twitter
Visit my Amazon store to find all my favorite gardening, homesteading tools, and gadgets plus all of my printed garden books and journals!


Kim Mills is a homeschooling mom of 6 and lives on an urban homestead in Ontario, Canada. Blogging at Homestead Acres she enjoys sharing tips to help you save money, grow and preserve your own food.
Busisiwe
Saturday 19th of August 2023
Hi,i want to start a business,so i don't have an idea please help..
Lynn Kempen
Saturday 3rd of June 2023
Great informative article! I shared it in my ranch group, and just hatched 9 chicks. Now to figure out how to identify their sex (sans pronouns).
PS: You have a few grammatical errors (fix your "to" to "too" where appropriate, to perfect your blog).
Angi
Friday 28th of April 2023
Thank You. This article told me exactly what I needed to know. I couldn't find the humidity information in my book.
Sharon
Thursday 27th of April 2023
Thanks for the detailed instructions to guide a productive incubation and hatching. Now, on to read about the brooder ...
OLABIRAN SAMUEL
Sunday 27th of November 2022
How to hatch egg