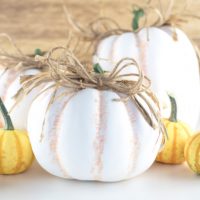
How To Paint Plastic Pumpkins For A Cute Farmhouse Look
Wondering how to paint plastic pumpkins from the dollar store? Yes, you can really make pretty farmhouse style pumpkins by painting cheap plastic ones! This quick and easy pumpkin craft is perfect for making table centerpieces or decorating your front porch for fall on a budget.
Yield: 1
Cost: 4.00
Equipment
- Foam paint brushes
- Small bristle paint brush
- Glue gun
- Hot Glue Sticks
Instructions
- Remove any tags or stickers from the plastic pumpkins and wipe them down to make sure they are clean.
- Wrap the stem in painters tape to keep it clean.
- Using a foam paint brush apply the first coat of white paint starting from the base of the pumpkin stem and working down to where the bottom starts to curve under. When the first coat is finished set the pumpkin aside to dry. Apply as many coats as needed until you can't see the orange plastic coming through, 3 to 4 coats are normally enough.
- Once the top has been painted and dried finish painting the bottom of the pumpkin and then set it on its side to dry.
- Remove the painters tape from the stem and paint with your choice of green or brown paint and let dry.
- Next, use your choice of secondary colors to add shading to the pumpkins. I mixed orange and white chalk paint together to make a very light orange and applied it in the groves of the pumpkin using a dry brush. Set it aside to dry.
- If desired dry brush some white paint over top of the orange to soften the look and let dry.
- Take a length of raffia and glue it down on one side of the pumpkin stem, wrap the ends around and glue on the other side. Then repeat this step starting the next section of raffia on the opposite side of the stem.
- Make a small bow out of twine and hot glue it to the base of the pumpkin stem.