
How To Can Cherry Pie Filling
This post may contain affiliate links, my full disclosure can be read here. As an Amazon Associate I earn from qualifying purchases.
It’s cherry season and making sweet cherry pie filling is so easy. I like to make large batches and can it so my family can enjoy this treat all year. Keep reading to see how to can cherry pie filling, it’s so easy to do!

There are so many ways to preserve cherries to enjoy throughout the year, from making cherry jam to canning cherries in syrup. But making pie filling that’s ready to use is a great option for making quick desserts.
This homemade cherry pie filling recipe can be used for either sour pie cherries or sweet cherries, they always come out yummy. You can make this recipe with either fresh or thawed frozen cherries.
My favorite way to buy cherries for canning is prepitted in 5 kg buckets. It’s cheaper and saves a lot of time. Starting in July I can find these bulk buckets of cherries in our local grocery stores.
Canning Supplies Needed For Cherry Pie Filling
- Water bath canner
- Canning jars
- Canning lids and rings
- Jar lifter
- Canning funnel
- Cherry pitter (optional)
- Large pot
- Strainer
- Ladle
Ingredients For 1 Qt. Jar
3-1/3 cups Sour cherries, Fresh or thawed
1 cup Granulated sugar
1/4 cup + 1 tbsp Clear Jel
1-1/3 cups Cold water
1 tbsp + 1tsp Bottled lemon juice
Ingredients For 7 Qt. Jars
6 quarts Sour cherries, Fresh or thawed
7 cups Granulated sugar
1-3/4 cups Clear Jel
9-1/3 cups Cold water
1/2 cup Bottled lemon juice
How To Make Cherry Pie Filling
The first step in making your yummy pie filling is to wash and get those cherries pitted! This is definitely the most time-consuming part but a good cherry pitter helps to make the job easier.
Leifheit Cherry Pitter with Stone Catcher Container | Cherry Stone Remover Tool
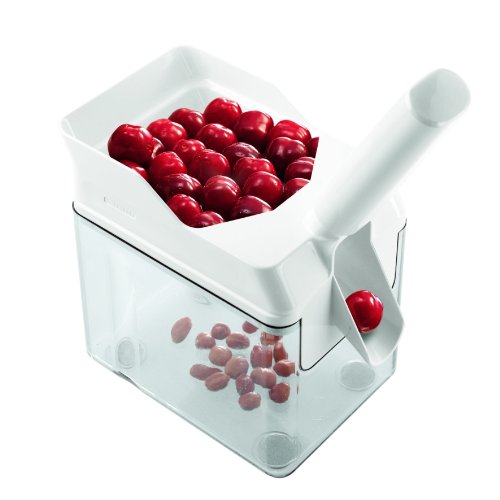
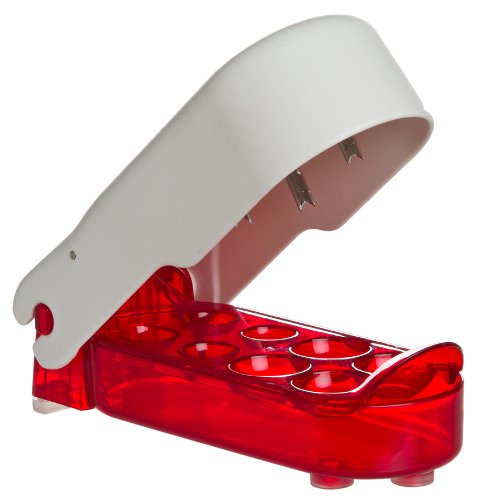
If you’ve been to a pick-your-own place, make sure to ask if they have a cherry pitting machine. This will make your job so much easier!
To keep the stem and blossom end from turning brown as your working, place the cherries into a bowl of water with some lemon juice or ascorbic acid powder.
Fresh cherries need to be blanched before canning. Take about 6 cups of cherries at a time and place them into a large pot of boiling water, and blanch for 1 minute.
When the times up, drain the cherries, but keep them covered in your pot or bowl to keep them warm.
Mix the Clear Jel with your sugar first this will help prevent it from clumping.
Then add your Clear Jel, sugar, and water into a large pot and cook it over medium heat until your mixture starts to thicken and bubble.
Hoosier Hill Farm Clear Jel, 1.5 Lbs.
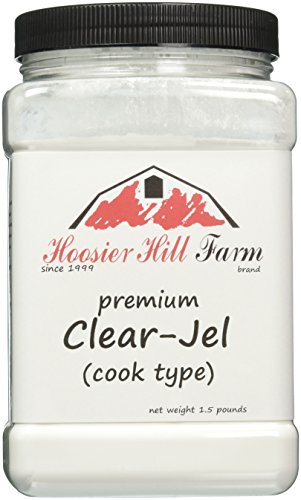
Clear Jel is the best thickener to use in pie filling when your canning. Unlike normal cornstarch and flour, it doesn’t break down into a runny mess when cooked. But it’s important not to use the instant type you want the original Clear Jel like the one shown here.
Now it’s time to add the lemon juice and bring the mixture to a boil for 1 minute, stirring constantly. Add your cherries, stirring gently to mix them in well.
How To Can Cherry Pie Filling
Remove the pot from the heat and fill your jars with the cherry pie filling, making sure to leave 1 inch of headspace.
Run a spatula around the inside edge of your jars to remove air bubbles, and then wipe the jar rims clean. Place the lids and rings on your jars.
Then, process the jars in a water bath canner according to your altitude.
Canning Times For Cherry Pie Filling
| Altitude in Feet | Time |
| Under 1000 ft. | 30 minutes |
| 10001-3000 ft. | 35 minutes |
| 3001-6000 ft. | 40 minutes |
| Over 6000 ft. | 45 minutes |
Tips For Making Homemade Cherry Pie Filling
What thickens pie filling?
Homemade pie fillings like cherry pie are normally thickened with flour, cornstarch, or tapioca. That works great if you are making a fresh pie. But if you are going to can your own homemade cherry pie filling, then you need to use Clear Jel.
This is because these thickeners will break down in the canning process and, over time, make the pie filling runny. Clear Jel is a modified type of cornstarch that is made to hold up to the high temperatures of canning without breaking down.
Make sure you use the regular type of Clear Jel, not the instant one for canning.
How to make cherry pie filling from frozen sour cherries
You can easily use frozen cherries to make homemade pie filling. It’s best to use unsweetened frozen cherries if possible. Then simply thaw the cherries and follow the recipe.
If you are using sweetened frozen sour cherries, rinse them well while they are still frozen. Place the cherries into a strainer over a bowl to collect the juice as they thaw. Save the liquid and use it to replace some of the water in the recipe.
Cherry Pie Filling Recipe To Can

How To Can Cherry Pie Filling
Ingredients
- 3 1/3 cups Sour or Sweet cherries Fresh or thawed
- 1 cup sugar
- 1/4 cup + 1 tbsp Clear Jel
- 1 1/3 cups Cold water
- 1 tbsp + 1 tsp lemon juice
- 6 quarts Sour or Sweet cherries Fresh or thawed
- 7 cups sugar
- 1 3/4 cups Clear Jel
- 9 1/3 cups Cold water
- 1/2 cup lemon juice
Instructions
- Wash and pit your cherries. To prevent them from browning place the cherries into water with lemon juice or ascorbic acid added.
- If you’re using fresh cherries blanch them in batches of 6 cups for 1 minute at a time.
- Drain the cherries and cover to keep warm.
- Mix together the clear jell and sugar, then add this mixture and the water to a large pot. Stir over medium heat until the mixture thickens and starts to bubble.
- Add the lemon juice and bring to a boil for 1 minute, stirring constantly.
- Stir in the cherries to combine well.
- Fill the canning jars with the pie filling leaving 1 inch headroom. Remove the air bubble from the jar and wipe the rims clean.
- Add the lids and process in your waterbath canner for 30 minutes or according to your altitude.
These values are from a nutritional database and automatically calculated, and should only be used as an approximation.

Kim Mills is a homeschooling mom of 6 and lives on an urban homestead in Ontario, Canada. Blogging at Homestead Acres she enjoys sharing tips to help you save money, grow and preserve your own food.




Can you use this recipe but substitute blueberries?