
Easy Strawberry Jam Recipe Without Pectin And Low Sugar
This post may contain affiliate links, my full disclosure can be read here. As an Amazon Associate I earn from qualifying purchases.
Easy strawberry jam recipe without pectin and low in sugar it’s the perfect jam recipe to make for your family.
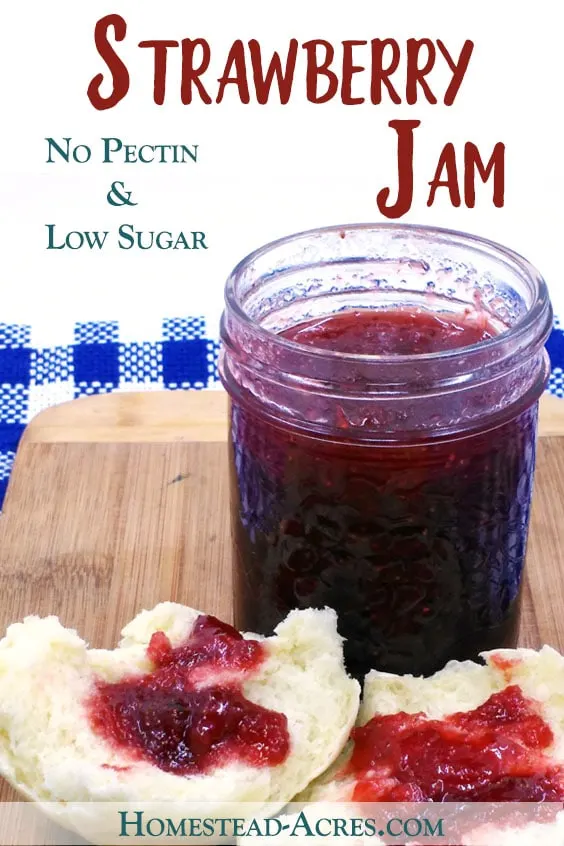
It just isn’t summer to us until we start making strawberry jam on our homestead! It has been a family tradition every year since I was a little girl.
Back then I can remember some years we went strawberry picking to a local pick your own farm, other years we bought flats of strawberries from the local store. If it wasn’t a good growing season we would also buy frozen berries to make jam with.
I can still remember the frozen strawberries came in these hard plastic containers that you had to pull a tab to open and they were packed in there solid! We always turned the containers upside down inside a pot to thaw before starting to cook the jam.
That was so much more work then the plastic bags of frozen berries I see in stores now.
My favourite way though was when we went strawberry picking. Although we grow strawberries we still take our kids to a pick your own strawberry farm every summer.
We have such a great time picking and snacking before coming home to start making our own homemade jam.
Strawberry jam is always the first homemade jam we start making of the season. The only sweet treat that is sooner is our yummy wild violet jelly and dandelion jelly. But that’s flower jellies, not fruit right!
Now the strawberry jam that I grew up making had a lot more sugar then this recipe does and used pectin it tastes so good. But, I now prefer to have jams with much less sugar.
After all, strawberries are sweet! I enjoy tasting the natural sweetness of the fruit in my jams. The good thing is that making strawberry jam without pectin is easy!

This type of low sugar, no pectin strawberry jam is just a little runnier then the jam you would buy from the store. It’s just like the jam my grandma used to make.
If you want a solid, jelly type of strawberry jam then try this recipe instead but it uses pectin and higher amounts of sugar to get that nice, firm jell.
But don’t worry if anyone has told you that you can’t make strawberry jam set without using pectin that simply isn’t true!
Strawberries are naturally high in pectin and so are lemons. So when you combine strawberries and lemons together with a little sugar you can have a yummy jam that tastes amazing, is healthier and costs less to make.
Supplies For Making Strawberry Jam
When I first started canning I bought a kit just like this one and it helped me so much! The handy tools made all my canning so much easier and I saved a lot of money buying them in a kit instead of individually.
Ingredients For Homemade Strawberry Jam
- 8 cups strawberries
- 3 cups sugar
- 1/4 cup lemon juice
How To Make Low Sugar Strawberry Jam Without Pectin
Step 1. Prep The Jars
Wash your jars, lids, and rings in hot soapy water and set aside until ready to use.
Step 2. Measure Fruit
Measure out 8 cups of strawberries, wash and hull them.
Step 3. Prepare Fruit
Next, mash your strawberries with a potato masher, blender or food processor until they are the consistency that you like. I like strawberry jam with chunks of fruit in it while my hubby and some of my kids like their jam very smooth so I make batches both ways.
I use my food processor to blend batches of strawberries quickly, it saves me so much time!
Step 4. Cooking Your Jam
Combine the strawberries, sugar and lemon juice into a large heavy-bottomed pot. Over medium heat stir until the sugar is fully dissolved. Then bring this mixture to a boil, stirring often to keep it from burning.
Step 5. Testing For Setting
Continue boiling the strawberry jam gently until it reaches 220 F on a candy thermometer. This takes about 25 minutes.
I love using my candy thermometer for making low sugar and no pectin jams and jellies but if you don’t have one you can also do the sheet test.
Place a metal spoon in the freezer before you start cooking the jam. When you think the jam is almost done take the spoon and ladle a little jam into it. If it drips off in small drops it’s not ready yet.
If the jam slides off the spoon in a solid sheet or stays stuck on the spoon it’s ready. Take it off the heat.
Step 6. Pour Into Jars
Set your canning jars onto a towel and label the jam into them leaving 1/4 inch of headroom. Using a canning funnel makes this part so much easier!
Wipe the rims of the jars clean with a wet towel, place the lids and rings on finger tight.
Step 7. Canning
Place the canning jars on the canning rack inside of the water bath canner, making sure the water covers the top of the jars by 1–2 inches. Bring the canner to a boil. Once the water is boiling set your timer for 10 minutes.
When the 10 minutes processing is up, turn the heat off and let the canner sit for 5 minutes. Then take the lid off and using your jar lifters take the jars of strawberry jam out of the canner and place them on a towel in a draft-free area.
Let the jars sit undisturbed for 24 hours. You will hear “ping” sounds as the lids snap down and seal.
The next day, check the seals of the jars by pressing down in the center of the lid. If the lid presses up and down then it’s not sealed. Either reprocess these jars or place them in the fridge to use first.
The jars that have sealed, take the rings off, and wipe down the jars with a damp cloth. Then label them and place them in a cool dark place.

Easy Strawberry Jam Recipe Without Pectin And Low Sugar
Ingredients
- 8 cups strawberries
- 3 cups sugar
- 1/4 cup lemon juice
Instructions
- Wash your jars, lids, and rings in hot soapy water and set aside until ready to use.
- Measure out 8 cups of strawberries, wash and hull them.
- Next, mash your strawberries with a potato masher, blender or food processor until they are the consistency that you like.
- Combine the strawberries, sugar and lemon juice into a large heavy-bottomed pot. Over medium heat stir until the sugar is fully dissolved. Then bring this mixture to a boil, stirring often to keep it from burning.
- Continue boiling the strawberry jam gently until it reaches 220 F on a candy thermometer. This takes about 25 minutes.
- Set your canning jars onto a towel and label the jam into them leaving 1/4 inch of headroom. Using a canning funnel makes this part so much easier! Wipe the rims of the jars clean with a wet towel, place the lids and rings on finger tight.
- Place the canning jars on the canning rack inside of the water bath canner, making sure the water covers the top of the jars by 1-2 inches. Bring the canner to a boil. Once the water is boiling set your timer for 10 minutes.
- When the 10 minutes processing is up, turn the heat off and let the canner sit for 5 minutes. Then take the lid off and using your jar lifters take the jars of strawberry jam out of the canner and place them on a towel in a draft-free area. Let the jars sit undisturbed for 24 hours.
- Check the jars to make sure they have sealed. The jars that have sealed, take the rings off and wipe down the jars with a damp cloth. Then label them and place them in a cool dark place. Any that haven’t place into the fridge.
Notes
These values are from a nutritional database and automatically calculated, and should only be used as an approximation.
Connect With Homestead Acres!
Be sure to follow me on social media, so you never miss a post!
Facebook | Twitter | Pinterest | Instagram
Visit my Amazon store to find all my favorite gardening, homesteading tools, and gadgets plus all of my printed garden books and journals!

Connect With Homestead Acres!
Be sure to follow me on social media, so you never miss a post!
Facebook | Twitter | Pinterest | Instagram
Visit my Amazon store to find all my favorite gardening, homesteading tools, and gadgets plus all of my printed garden books and journals!

Kim Mills is a homeschooling mom of 6 and lives on an urban homestead in Ontario, Canada. Blogging at Homestead Acres she enjoys sharing tips to help you save money, grow and preserve your own food.




This is so easy, but like all things made with love, it takes time. From the time I started washing, sorting and preparing the berries, to the time I pulled them out of the water bath, was about 3 1/2 hours. It was about 45 minutes of stirring and testing on medium heat, once the berries had started to boil. I also added a half a grated, peeled green apple, and the lemon zest from my lemon that I used for the lemon juice, to add a little extra pectin to the jam.
Summer in a jar!
I think because I measured the 8 cups of berries after I had hulled and chopped them, not before, plus I added the grated green apple, my yield was 6 x 250 ml jars.
Hi! Can I substitute regular white sugar for agave or maple syrup instead?
I want to be able to preserve my jam for a while.
Thanks!
Thank you for the wonderful recipe! About 6 years ago I canned applesauce and peaches and wanted to give it a go again and found your recipe. I am sitting in the kitchen waiting for the water to boil so I can process the jars. My husband tasted some of the jam and absolutely loves it! It took much longer for the strawberries to come to the 220 temperature. I actually had 12 cups so adjusted for that. It worked out wonderfully!